It’s no surprise that more people are finding themselves with extra time on their hands, and learning how to make alcohol at home can be a good pastime. After all, fermenting wine and distilling spirits from basic ingredients is easy to do as long as you have the right equipment, properly-sterilized containers, and of course, safety precautions in place.
It also depends on what type of drink you’re aiming for, but the general rule of thumb in DIY alcohol is to be patient. Making alcohol at home is not exactly rocket science; however, it requires a lot of attention to detail, multiple adjustments if necessary, and sometimes a bit of extra research. Ultimately, the goal is to have fun and feel good about yourself.
Things to remember before making alcohol at home
Safety comes first. Whether it's wine or spirits, inexperienced and careless homebrewers are always at risk of unwittingly using harmful ingredients that can be lethal or cause blindness to those that drink them.
Distilling alcohol without a license is illegal. While non-commercial brewing of beer and fermenting of wine are allowed almost everywhere, distilling alcohol without a license is prohibited, as in most countries.
Making alcohol requires passion. If you want to make alcohol, it should be because you really want to. The best homebrewers take pride in being able to come up with their own drink and therefore are willing to put safety on top of everything.
Making alcohol requires a lot of sterilization. Any contaminant from any stage of the process that gets in, whether airborne or in the alcohol container you used, can cause the concoction to be malignant.
Invest in the right tools. Do you want to make your own alcohol to save a few bucks by having your own stash at home? If you’re not willing to splurge on a good drink, chances are you’re not willing to spend extra on safety tools and equipment. It’s not going to be worth saving money at the expense of compromising your health and that of others.
Containers need to be sealed properly. Having a controlled environment and clean equipment is a must.
The thing about homemade wine is that it can taste awful, but it can also taste great. As a matter of fact, if you’ve already reached a certain level of expertise, you can make wine at home that is better — not “as good as” — but betterthan any bottle of wine you’ve ever tasted.
Thoroughly sterilize your equipment and then rinse clean. Look up special detergents and bleaches online.
Select your grapes and toss out rotten or odd-looking ones. Remove the stems and wash thoroughly.
Crush the grapes to release the must (grape juice) into the main fermentation container. You can use your hands to do the crushing, but if you're making a lot of wine, you might want to get a fruit press online or from a wine supply store.
Insert the hydrometer into the must. If it reads less than 1.010, add sugar. When adding granulated sugar, dissolve it in pure filtered water first, then add to the must and stir thoroughly.
Cover the bucket with a cloth. The key is to allow the must to ferment for 7-10 days. You’ll notice froth to develop on top and the sediment to fall to the bottom.
2. Separating the wine from sediment
Strain the juice to remove the sediment and froth.
Run the juice through a funnel into your backup fermentation containers. Make sure to fill the containers to the top to lessen the amount of air reaching the wine. Then, airlock the containers.
Use the plastic tube to siphon the wine into the containers.
Continue to periodically siphon the wine off the sediment. This process is called "racking". Do this for 2-3 months until the wine runs clear.
3. Bottling, storing, and aging
Using the vinyl tubing, run the wine into the bottles, leaving space for the cork and about ½ inch of extra room. Insert the corks.
Store the wine upright for the first 3 days.
After 3 days, store the wine on its side at 55°F ideally. White wine is ready to consume after only 6 months, but age red wine for at least a year before drinking it.
Is it hard to make wine at home?
Making wine at home can sound a bit daunting to the uninitiated, but it’s no more complicated than making sourdough bread. It will demand more of your time and a few special tools. Creative imagination is also useful, and a good way to start is to do a bit of reading to gain a higher appreciation for professional winemakers.
Can homemade wine get you drunk?
Homemade wine generally contains 10% to 12% alcohol and that’s when using a wine kit. If via fermentation, homemade wine can reach a maximum of about 20% alcohol by volume (ABV), and that requires some level of difficulty.
Are there any dangers of drinking homemade wine?
In general homemade wine is just as safe as commercial wine. The stuff that makes you sick (pathogenic bacteria) will not likely survive in wine. Those that survive are just common spoilage bacteria, and while they can make your wine unpalatable, it will not seriously harm you unless you drink excessively.
How to make vodka at home
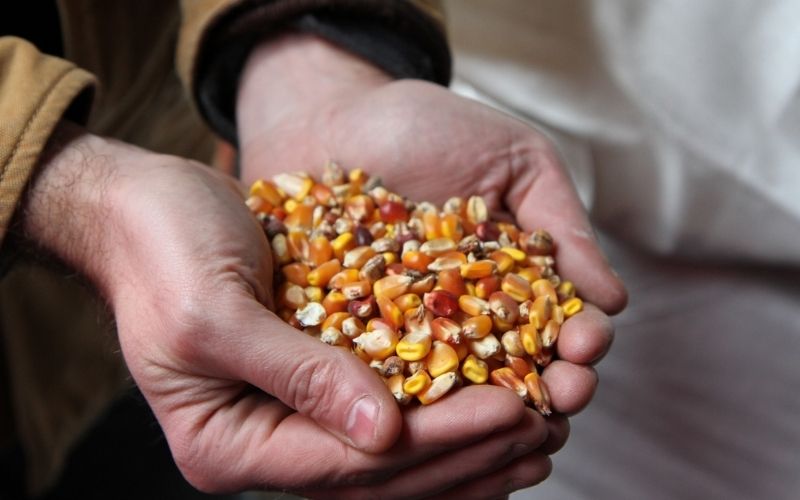
Making vodka at home involves fermenting any foodstuff that contains sugar or starch, and then distilling the product to increase its alcohol content. Today, the majority of vodka is made from fermented grains such as sorghum, corn, rice, rye, or wheat. But you can also use potatoes, fruits, or even just sugar.
Pour the mash into your stock pot and add 7 gallons of water.
Raise the heat to 140°F and stir continuously until the temperature is reached.
While mixing, add 5 pounds of crushed malted barley.
Stir for 30 seconds every 4 minutes while holding the temperature at 140°F.
After 20 minutes, raise it to 152°F and hold for 1 hour. Stir for 30 seconds every 10 minutes.
Take a gravity reading. If below 1.065, add sugar to reach 1.065.
Cool it down to 75°F. If possible, cool it overnight to give the barley enzymes more time to break down potato starches.
2. Fermenting the mash
First, create a yeast starter. Pour 4 oz. of 110 °F water into a sanitized jar and add 2 teaspoons of sugar. Stir thoroughly. Then, mix in the yeast and stir again. Let the starter sit for 20 minutes and see the mixture’s volume double over time.
Pour the mash through a strainer and transfer the liquid to the fermentation bucket. Try to create as much splash as you can to properly aerate the mixture, but be careful enough not to lose any liquid.
Mix the yeast starter into the fermentation bucket.
Airlock the bucket and ferment the mixture for 2 weeks at room temperature.
Optional: You can use iodine to quickly check if fermentation has finished. Take a liquid-only sample off the top of your wash. Put the sample onto a white plate and drip in a few drops of iodine. If it turns blue, it has reacted to starches present which means the fermentation is not complete. Check back after a few days.
You can also check the ABV level by using a hydrometer.
Once fermentation is done, you’ll need to completely remove any solid material using a cheesecloth.
3. Distillation
Clean your still. Even if you’ve already cleaned it after your last run, you’ll want to clean it again.
Add clean copper packing to your column. Vodka is a high-proof spirit, so you’ll need to maximize reflux during the run.
Add your wash to the still. Use the auto-siphon. As much as possible, reduce the amount of sediment in your wash.
Make sure your column is packed, and that any domes, columns, or condensers are properly attached, as well as any hoses. Now, fire up that still. Turn on the heat source and start raising the temperature of your wash.
At about 170°F, the still will start producing. You’ll want to make adjustments to your heat source setting to achieve a consistent rate of 1-3 drips per second.
4. Collecting the vodka distillate
The first 5% of your run are the foreshots. Foreshots contain methanol which is extremely volatile and toxic. Obviously, this part is not for consumption. Carefully isolate your foreshots and throw them out.
The next 30% of your vodka run is known as the heads. Just like the foreshots, the heads of your run are saturated with vaporous alcohols. Drinking heads will leave you with the worst hangover of your life. Isolate and throw them out.
The next 30% is the main attraction of your vodka run, the hearts. You’ll notice the sweet-smelling ethanol pronouncing itself.
This is the tricky part. Maximizing high-quality hearts heightens the senses. You need to accurately identify where the acetone stops and the sweet ethanol begins.
The final 35% of your vodka run is the tails. The tails contain protein and carbohydrates from the wash that you don’t want in your product. Most distillers set the tails aside for future re-runs.
Is it hard to make vodka at home?
Vodka is both the easiest and the hardest alcohol to make. It’s easy considering that you can make vodka out of anything that has fermentable sugar. It’s also difficult because you would need a still (a licensed one, at that) capable of distilling the fermented mash to a high alcohol level. Assuming you have access to all the equipment, then the hard part is over.
Can homemade vodka get you drunk?
The fermentation process creates a vodka with only about 16% ABV, which is way too low for spirits. But you’re going DIY, so that means you can make the extract stronger by putting it back in the distillation setup to minimize alcohol loss. You can perform tweaks and make it on par with commercial vodkas at 40% ABV or stronger.
Are there any dangers of drinking homemade vodka?
There’s a reason why distilling at home without a license is illegal. You can seriously harm yourself and others even without getting to the drinking part. The distilling process alone involves dangers (highly flammable alcohol vapors and heat do not go together), and even when you’re able to survive the delicate process, you can still end up consuming a poorly-made and potentially unsafe drink.
How to make whiskey at home
One great fact about whiskey is that you can make it in more-or-less the same way that it’s been made commercially for centuries. There’s no big difference between how they do it in big distilleries except you’d be doing it at a tiny fraction of the cost and in the comfort of your home.
Put the corn in the burlap bag and cover it with warm water. Leave the bag in a dark place, and keep the corn moist for 7-10 days until the sprouts grow to the size of a quarter of an inch.
Wash the corn in warm water, removing all sprouts and roots. Transfer the corn to your main fermentation jars.
Mash the corn until you are sure that every kernel is broken.
2. Fermentation
Add 5 gallons of boiling water to the mash. When it cools, add the yeast. Seal the jars but leave a place for air to enter to let the fermentation process breathe.
The fermentation period will take 7-10 days, depending on the yeast, the temperature, and how much grain you're using. After a few days, your mash will start to change.
3. Distillation
Heat the wash in the still starting from medium temperature until it reaches a boil. Keep it between 172° and 212°F.
Throw out the foreshots and heads. For a 5 gallon wash, prepare to throw out the first 50 - 100 mL of condensed liquid just to be safe.
Collect the hearts in 500 mL batches until you get to the tails part.
4. Aging and diluting the whiskey
Whiskey is typically aged in oak barrels for about 3-6 months or longer. You can add oak flavor to your whiskey by adding toasted oak chips.
After aging your whiskey, you'll want to dilute it. At this point, the whiskey probably contains 60- 80% ABV, which would result in extremely strong, uncomfortable drinking. Before you drink it and bottle your whiskey, it should be diluted to around 40% or 45% ABV for a much more satisfying drinking experience. Now you’re ready to drink! Care for a decanter?
Is it hard to make whiskey at home?
It’s easy to make whiskey. But great whiskey, now that’s a different story. The key lies in the waiting part. Whiskey is one of those spirits where age does matter. The wood from the barrels tends to break down the harsher flavors in the alcohol, leaving you with a smoother taste the longer it stays in there.
Can homemade whiskey get you drunk?
Your favorite middle-of-the-road whiskey is around 40-65% ABV. Homemade whiskey can go up or under, depending on how efficiently alcohol was separated from water using evaporation and condensation.
Are there any dangers of drinking homemade whiskey?
The biggest danger when making whiskey at home is the process of distillation. Pure ethanol is always dangerous especially with a heat source in the vicinity. But as far as drinking goes, the dangers are minimal, granted of course, that you follow the procedures to a tee and uphold safety at all times.
Knowing how to make alcohol at home is not exactly your typical garden-variety pastime, as it requires a lot of precision, patience, and money, especially if you want to do it right. And that’s not even mentioning the risks involved. However, just like any other passion project, the rewards are very satisfying, and that’s exactly why many people are into it.
Now if you feel like homebrewing is not your thing (or you want to give yourself more time to think about it), you can try bartending at home in the meantime. Enjoyed this read? Share it with your fellow alcohol enthusiasts.
The thing about homemade wine is that it can taste awful, but it can also taste great. As a matter of fact, if you’ve already reached a certain level of expertise, you can make wine at home that is better — not “as good as”— but better than any bottle of wine you’ve ever tasted.
Thoroughly sterilize your equipment and then rinse clean. Look up special detergents and bleaches online.
Select your grapes and toss out rotten or odd-looking ones. Remove the stems and wash thoroughly.
Crush the grapes to release the must (grape juice) into the main fermentation container. You can use your hands to do the crushing, but if you're making a lot of wine, you might want to get a fruit press online or from a wine supply store.
Add wine yeast.
Insert the hydrometer into the must. If it reads less than 1.010, add sugar. When adding granulated sugar, dissolve it in pure filtered water first, then add to the must and stir thoroughly.
Cover the bucket with a cloth. The key is to allow the must to ferment for 7-10 days. You’ll notice froth to develop on top and the sediment to fall to the bottom.
Recipe Note
Homemade wine generally contains 10% to 12% alcohol and that’s when using awine kit. If via fermentation, homemade wine can reach a maximum of about 20% alcohol by volume (ABV), and that requires some level of difficulty.